Choosing the Right Drywall for Your Project

Jan 10, 2024

Choosing the Right Drywall for Your Project: A Comprehensive Guide

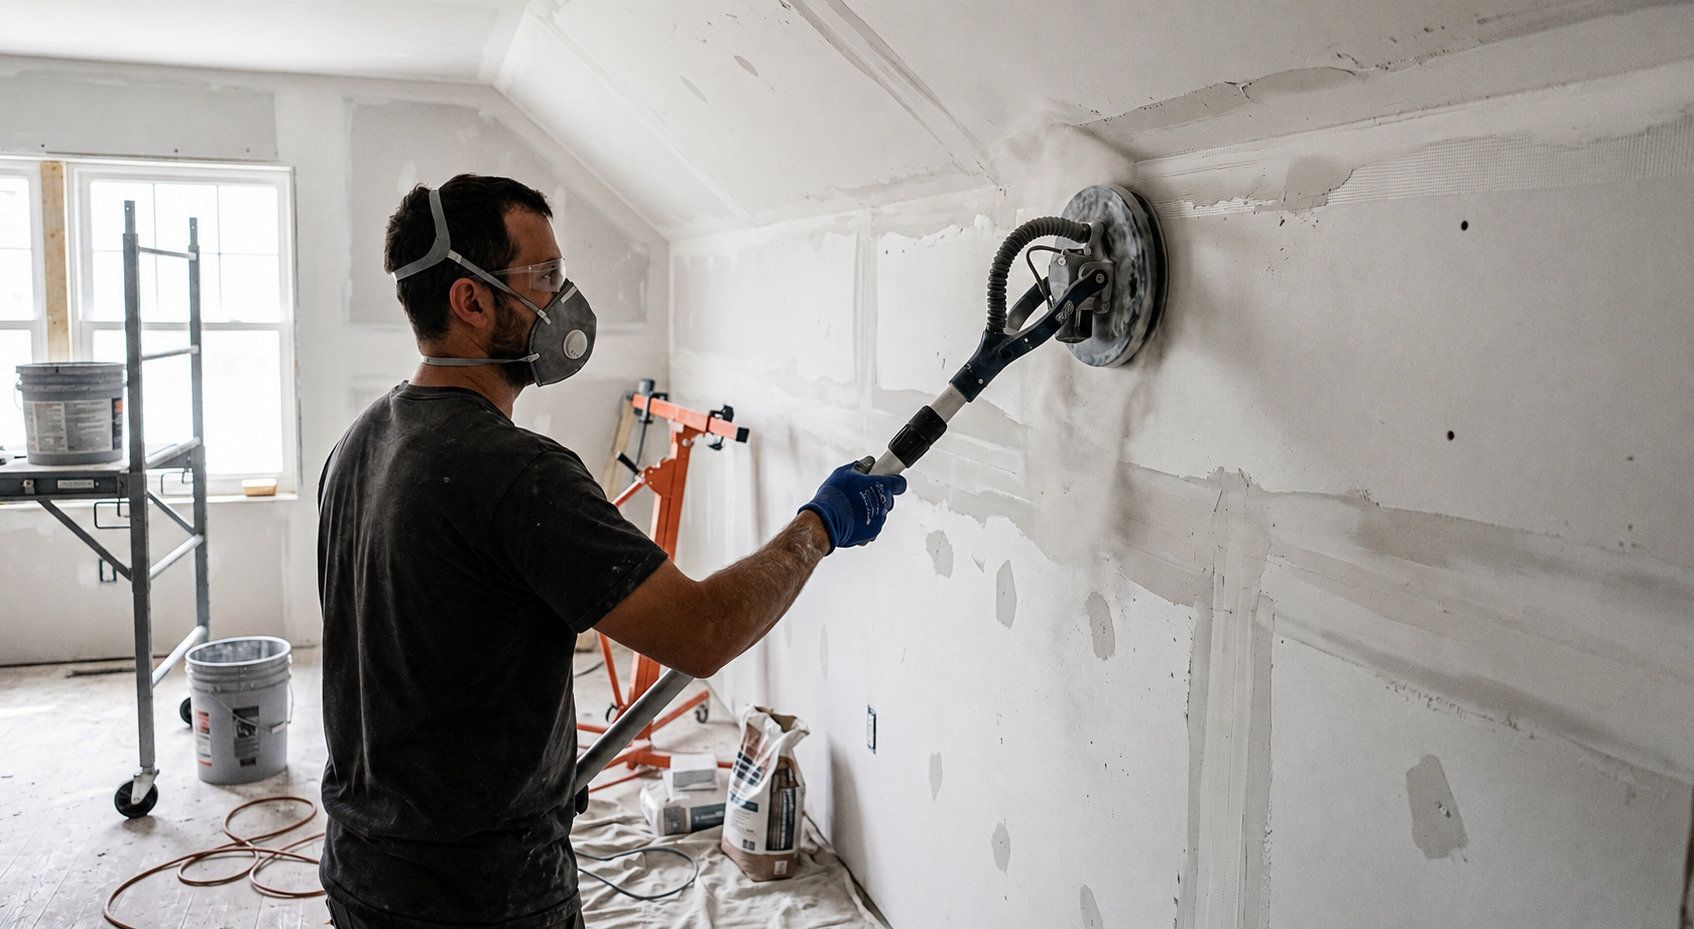
When it comes to construction or renovation projects, selecting the right materials is crucial for ensuring the success and longevity of the endeavor. Drywall is a fundamental component of interior construction, serving as the canvas for paint, texture, and other finishes. Choosing the right type of drywall can impact not only the aesthetics but also the performance and durability of the finished space. In this comprehensive guide, we will explore key considerations to help you make an informed decision when selecting drywall for your project.


Types of Drywall


Standard Drywall (Regular Whiteboard):


Standard drywall, often referred to as regular whiteboard, is the most common type. It's suitable for a wide range of applications, including residential and commercial projects. It comes in various thicknesses, with 1/2-inch and 5/8-inch being the most prevalent. Standard drywall is versatile and cost-effective, making it a popular choice for interior walls and ceilings.


Greenboard Drywall:


Greenboard drywall is moisture-resistant and specifically designed for areas with high humidity, such as bathrooms and kitchens. It has a green paper covering that provides increased resistance to mold and mildew. While it offers better protection against moisture than regular drywall, it is not suitable for wet areas like shower surrounds.


Blueboard Drywall:


Blueboard drywall, also known as plaster baseboard, is designed for veneer plastering. It has a special paper surface that allows for better adherence of plaster, providing a smooth and durable finish. Blueboard is commonly used in commercial applications and areas where a more refined plaster finish is desired.


Fire-Resistant Drywall:


Fire-resistant drywall is designed to slow down the spread of flames in the event of a fire. It comes in two main types: Type X, which is thicker and denser, and Type C, which incorporates additional additives for enhanced fire resistance. This type of drywall is commonly used in garages, utility rooms, and areas where building codes require fire-rated materials.


Considerations for Choosing Drywall:


Project Location:


Consider the specific location of your project. For wet areas like bathrooms, kitchens, or basements, moisture-resistant drywall such as greenboard may be a wise choice. In areas where fire resistance is crucial, opt for fire-resistant drywall.


Budget:


Assess your budget constraints. Standard drywall is generally the most cost-effective option, but if specific features like moisture resistance or fire resistance are necessary, be prepared to allocate a higher budget.


Intended Finish:


The type of finish you plan to apply to the drywall can influence your choice. Some drywall types, like blueboard, are specifically designed for plaster finishes, while others may be better suited for paint or texture applications.


Building Codes and Regulations:


Familiarize yourself with local building codes and regulations. Some areas may have specific requirements for fire-resistant materials, especially in multi-family dwellings or commercial spaces.


Installation Expertise:


Consider the expertise required for installation. While standard drywall is relatively easy to install, specialized drywall types like blueboard may require experienced professionals for optimal results.


Call one of our experts at Drywall Victoria CNL for a free quote!

You might also like

02 May, 2024
Embarking on a do-it-yourself (DIY) drywall project can be both rewarding and challenging. Whether you're repairing a small hole or tackling a larger renovation, having the right tools and equipment is crucial for achieving professional-looking results. In this guide, we'll outline the essential drywall tools and equipment that every DIYer should have in their arsenal. Utility Knife A sharp utility knife is indispensable for cutting drywall panels to size, scoring and snapping them along straight lines, and trimming edges with precision. Look for a retractable knife with a comfortable grip and replaceable blades for efficiency and safety. Taping Knife Taping knives come in various sizes, but a 6-inch and 12-inch knife are essential for applying joint compound (mud) and smoothing tape during the taping and mudding process. Opt for stainless steel blades for durability and easy cleanup. Drywall Saw or Jab Saw For cutting openings for electrical outlets, light switches, or plumbing fixtures, a drywall saw or jab saw is indispensable. These saws feature sharp teeth designed to cut through drywall cleanly and efficiently. Drywall Screw Gun Driving screws into drywall by hand can be tedious and time-consuming. A drywall screw gun, specifically designed for this purpose, makes the task much faster and more effortless. Look for a screw gun with depth adjustment settings to ensure consistent screw depth without damaging the drywall surface. Drywall T-Square A drywall T-square is essential for marking and cutting straight lines on drywall panels accurately. This L-shaped tool provides a straight edge for scoring and snapping panels cleanly along predetermined measurements. Mud Pan A mud pan is a shallow, flat-bottomed container used for holding and mixing joint compound during the taping and mudding process. Choose a stainless steel or plastic mud pan with tapered sides for easy scooping and minimal waste. Sanding Block or Pole Sander After applying joint compound, sanding is necessary to smooth out imperfections and achieve a seamless finish. A sanding block or pole sander fitted with fine-grit sandpaper is ideal for this task, ensuring smooth, uniform results without damaging the drywall surface. Corner Trowel To achieve clean, crisp corners when taping and mudding inside corners, a corner trowel is indispensable. This specialized tool features a narrow blade designed to fit into tight spaces and create smooth, straight edges along corners. Drywall Lift (Optional) For larger projects or ceiling installations, a drywall lift can be a game-changer. This mechanical device holds drywall panels in place, allowing a single person to lift and position panels accurately without assistance. While not essential for small-scale DIY projects, a drywall lift can significantly reduce strain and simplify the installation process for larger jobs. With the right tools and equipment at your disposal, tackling a DIY drywall project becomes much more manageable and enjoyable. Whether you're patching a small hole or renovating an entire room, investing in high-quality tools designed specifically for drywall work will help you achieve professional-looking results and save time and frustration in the process. If you ever get in over your head on your project, don't hesitate to call us. Our drywall installation and repair experts are always ready to help!
09 Mar, 2024
The process of finishing and taping drywall is a critical step in achieving smooth, seamless walls and ceilings in any construction or renovation project. While it may seem daunting to novice DIYers or even experienced contractors, mastering the art of drywall finishing and taping can significantly elevate the quality of your interior spaces. In this guide, we'll explore essential tips and techniques to help you achieve professional-grade results. Prepare the Surface Before beginning the taping and finishing process, ensure that the drywall surface is clean, dry, and free of dust or debris. Use a drywall sander or sanding block to smooth out any rough patches or imperfections, and wipe down the surface with a damp cloth to remove excess dust. Choose the Right Tools and Materials Investing in high-quality tools and materials is essential for achieving professional results. Here are some essential items you'll need: Drywall tape (paper or fiberglass mesh) Joint compound (mud) Drywall knives (4-inch, 6-inch, and 12-inch) Corner tools (inside and outside corners) Sandpaper or sanding sponge Trowel or mud pan Apply the Tape Start by applying drywall tape over the joints between the drywall panels. Paper tape is the traditional choice and is applied by embedding it into a thin layer of joint compound. Fiberglass mesh tape is another option, which is self-adhesive and requires less initial mud application. Feather the Edges When applying joint compound over the tape, use a wide drywall knife to feather the edges and blend them seamlessly into the surrounding drywall. Apply multiple thin coats of mud, allowing each layer to dry completely before sanding and applying the next coat. Use the Right Techniques Apply even pressure when smoothing out the joint compound to avoid creating ridges or bumps. Use long, smooth strokes with the drywall knife to achieve a uniform finish. For inside corners, use a corner tool to apply and feather the joint compound smoothly. For outside corners, apply a corner bead and use a corner tool or trowel to embed it into the joint compound. Sand Between Coats After each coat of joint compound has dried, lightly sand the surface with fine-grit sandpaper or a sanding sponge to smooth out any imperfections or rough patches. Be careful not to sand too aggressively, as this can damage the drywall and create uneven surfaces. Prime and Paint Once the final coat of joint compound has dried and been sanded smooth, it's time to prime the surface before painting. Primer helps seal the drywall and provides a smooth base for the paint to adhere to. Choose a high-quality primer suitable for drywall and allow it to dry completely before applying paint. Practice Patience Drywall finishing and taping require patience and attention to detail. Rushing the process or applying too much joint compound can result in uneven surfaces and visible seams. Take your time and focus on achieving smooth, seamless results with each coat of mud and tape. Mastering the art of drywall finishing and taping is essential for achieving professional-grade results in any construction or renovation project. By following these tips and techniques, you can transform ordinary drywall surfaces into smooth, seamless walls and ceilings that enhance the beauty and functionality of your interior spaces. If you need a little help with a project, don't hesitate to call the drywall installation experts at Drywall Victoria !
10 Nov, 2023
Drywall is one of the most popular wall coverings available today. While there are many advantages that cause this popularity, its durability is not one of them. Drywall is much easier to damage than more archaic wall coverings like plaster or wood paneling - if you have lived in a home with drywall for very long, you have undoubtedly encountered a dent, crack, or even a significant hole. Fortunately, drywall is also fairly easy to repair. The same mud-and-tape method that is used to hide joints between drywall sheets during installation is just as effective at concealing even the most extensive repairs. So when the inevitable hole is made in your walls, don’t fret. Here are a few basic drywall repair techniques that will make your walls look like new in no time: Small Holes and Dents When you remove a nail from a wall, it will always leave a small hole. Likewise, door handles, furniture, and energetic children are notorious for leaving small dings in drywall. These common issues are very simple to fix. All it takes is a little bit of patching compound! If there is material sticking out from the wall, you can either trim it to be flush with the wall or use the handle of your putty knife to make a small dent in the wall. Then simply fill in the hole and/or dented area with self-priming patching compound, smooth it with a putty knife, and allow it to fully dry. After a few brushstrokes of paint, you won’t be able to tell there was ever a hole! Cracks Cracks appear in drywall for a variety of reasons. While some are a sign of more serious issues like foundation problems, most are caused by the normal expansion and contraction of wood framing. If the crack is open, it can be filled with patching compound just like a small hole. We then recommend coating the area with crack-repair spray to help the repair last as long as possible. Once the spray is fully dry, simply paint the area to match. Large Holes When accidents happen, they can leave large, unsightly holes in your walls. If the hole is larger than about ½” in diameter, patching compound alone will not solve the problem. Holes less than 6” in diameter can be fixed using a self-adhesive mesh patch. Simply smooth the outer edges of the hole, attach the patch to the wall, and cover it with two or three layers of patching compound. The largest holes will require new drywall to be cut and fitted into the hole. An area larger than the original hole may need to be removed from the wall so that the new drywall can be screwed into at least one stud (two studs, if possible). The process for these repairs is almost identical to the process for installing new drywall - once the drywall is secured, the edges are joined with layers of drywall compound and tape, sanded until smooth, and retextured to match the rest of the wall. If you want more information on this process, be sure to check out our blog post on The Basics of Drywall Installation!
More Posts
estimated_quoteArtboard 3

FREE QUOTE

Request a quote

Contact Us

Share by: